Tuesday, June 4, 2024

It's Only June, But its Halloween Time for Me

 It's only June but it's Halloween time for me.  I discovered the hard way, that folks start preparing for Halloween way before the start of October.  Some real diehard fans have Halloween on the brain year round.  So, because I sell my handcrafted Halloween items on-line, I have to have most items made by August the latest.  With summer being the outdoor time of the year in the mid-west, if I start crafting early, it makes it easier for me to dedicate some of those days to crafting not to mention getting things listed online.  

The first of my new projects for the 2024 Halloween season is another paper Haunted house.  I like to keep my paper houses on the small size because it makes it easier to find the appropriate paper and they are easier to ship.  

I start by selecting the colors and paper choices.  Then I get my base ready by painting it black. 


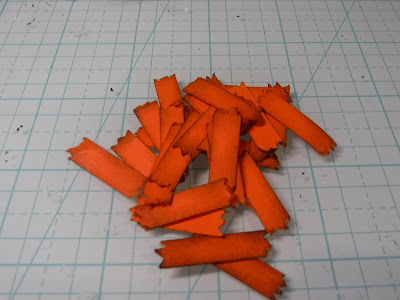
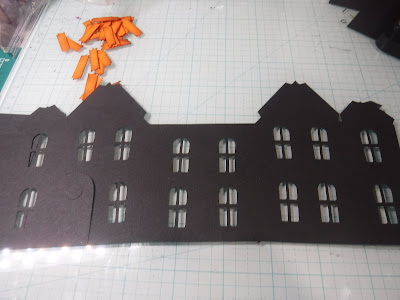
I then cut out all of the pieces I will need to start the house.  This one will be black and orange.  My favorite Halloween colors are the traditional ones.


Next, I glue on any pieces that need to be adhered to the house while it is still flat and  before I put the house together.


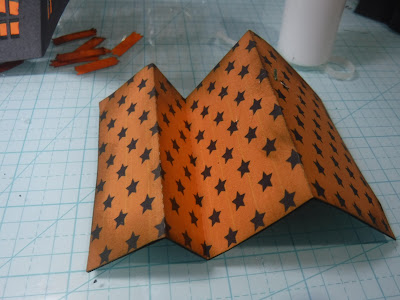
Then I glue the base of the house together before adding the roof.  For the glueing, I like quick drying glues like Art Glitter Glue  to hold things in place.


After the paint is dried, I gather up any additional embellishments before glueing the house to the base with hot glue.


I then work around the glued down house to add the additional decorative items.

After a few hours, I have a finished product.


Though I repeat the process over and over, I try to change up each little house by adding a little something different each time.  


Thursday, August 17, 2023

Catching UP

 Funny how when you have more time you get more obligations - not less.  It seems there is just never enough time to do the things you like instead of the mundane stuff like washing and cleaning.  

Well, I managed to sneak a few hours in to do some crafting and preparing for Halloween.  Of course I had to start out with making more of my favorite cloche projects.  I have a few left over from last year and decided I needed to make those first to make room for other things that I want to make and sell.  My biggest problem though is photographing the little spookies.  The shiny dome reflects even  minute amounts of light and since I use my little phone to take the shots, I have a dickens of a time getting a clear shot.

Next, I worked on my second most favorite projects - paper Halloween houses.  I did 3 or 4, each a little a different.  I sold two of one style and was thinking maybe I should make another of that design.  Hard to convince myself to do so though because I always want to make each one unique.  

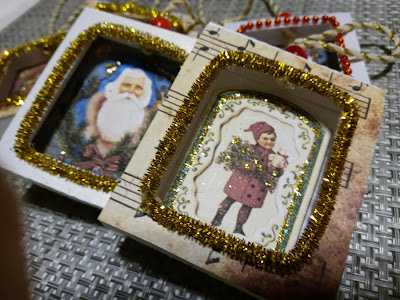
New this year are  small, paper, vintage inspired, Halloween shadow box ornaments.  I made about 4 to see the response  before I make more.  I think they are super cute.  They can be hung up or free standing.  So far I got a ton of "likes", but no purchases.

All of these were cut on my Silhouette.  

Stay tuned for more...I plan to get a few more hours in of crafting this weekend if I'm not too tired from ends.


Tuesday, November 22, 2022

It's Time to Pull Out the Glitter and Tinsel

 Now that Halloween has come and gone and Thanksgiving is in a few days, it's time to do my Christmas crafting.  Christmas if you haven't already heard me say before is my most favorite holiday to craft for. In the past I have made cards, tags, gifts and ornaments.  An in the most recent years I have made my little paper houses.

Because I caught COVID at a September wedding, my crafting plans fell way behind.  Given the shorter schedule, I decided to focus on some houses and ornaments.  I might attempt a few cards if I get the extra time.

Here are some of the crafts I've managed to make thus far:


Tuesday, August 30, 2022

Spooky Twins

 I'm still loving making paper Haunted Houses for friends, family and Etsy.  

I recently was gifted a tablet of Graphic 45 paper.  I wanted to incorporate the Halloween prints somehow into my designs.  I didn't want to layer the paper because I try not to waste resources if possible.  Because the paper isn't as sturdy as some cardstocks, I decided using it as roof pieces would work well.  Using two different prints in two different colors, I made twin houses in one display.  I added the obligatory tombstones, some scraggly moss and a velum ghost peeking from amongst the tombstones.  I added orange velum in the windows so that the addition of fairy lights guaranteed an eerie glow.

I used a wood plank painted black as a base so that my houses would have added sturdiness.


Not Just Halloween

 Though Halloween and Christmas are pretty much the reasons for my crafting, the environmentalist in me recognizes that I should maximize the use or purpose of my items.  I love all the little canvases that are for sale now.  But, I'm no artist so I had to find a way to make something with a canvas I had picked up months ago on a whim.

I saw a project where the maker used a paper wreath glued to a pre-printed canvas to make an accent piece.  I challenged myself to take the same concept and apply it to Halloween, taking the project one step further by making it displayable beyond the holiday.

I used this simple wreath shape from Miss Kate Cuttables, but changed the colors to reflect a little bit 'o Halloween and a little bit 'o fall.  I emulated the pre-printed background of the original project
by mod podging a muted Halloween paper to the canvas as a background.  Some black paint along the edges helped to bring out the wreath colors even  more.   In just a few hours, I had a completed project.


Thursday, August 25, 2022

Another Spooky Cloche

 I 'm sure that I have mentioned before that Halloween is one of my favorite holidays to craft for.  And filling this little cloches are a perfect craft to do.

Using air drying clay for a base, I decided to make a graveyard vignette.  I wanted it to be spooky so I had two skeletal hands look like they were reaching out of the ground.  I cut the ends off of a tongue depressor to make tombstones and added a twig and paper bats.  A little paint and moss finished off the base.


Sunday, July 17, 2022

Cutest Halloween Decor Project!

 While going through my stash I found a package of sturdy Halloween straws that I don't remember purchasing.  Luckily, I quickly recalled a cute little decor idea for "Halloween Lollies" that  I had seen somewhere on the internet.  Determined not to buy anymore supplies until I use most of what I already have, the project was perfect.  And this project is a good one for beginners because all that you have to do is cut, fold and glue.

Supplies needed are:

hot glue

glue gun

Printed paper

Paper straws

Craft Mat


I printed my paper from files I purchased from Simple Stories.  The Halloween prints were in black and orange and went well with the stripes on the straws.  I used Epson matte presentation paper that has a hefty weight and makes the print vivid.  I'm not sure that they still make it

Start by grabbing your supplies.


Make a simple rosette.  If you've never made a rosette before, you can find basic instructions here:
Simple Rosette.  I cut my paper 1.5 inches wide so that it would make a 3" rosette.  I thought that size looked well  balanced with the thin straws.


After attaching both ends together, I simple push down on the rosette to form a circle.  I pile a little glue on my craft mat and than scrunch the circle up around the glue, making sure that it is centered and adhered to all of the center.


Lift the rosette carefully off of the mat.


Once I have the rosette nice and secured and the glue has cooled, I flatten one end of the straw.
I glue that end to the back of the rosette.  I than cover the front and back with a paper circle that complements the colors.


I selected black because for Halloween it's a color that you can't go wrong with.


I printed out some vintage graphics I found on line and cut them in a circle. I  glued them in the middle of the medallion to add more interest.


I tied some orange ribbon on that I had in my stash for a little more pizazz.


-

And wha-lah, cute little lollies you can arrange into a display,  or add to a gift wrapping for a special
little Halloween treat.